
We may receive a commission on purchases made from links. Sure, you can grab all kinds of storage solutions like drawers, baskets, and boxes. But let’s be real — it can feel frustrating when you’re in the middle of a craft project and these quick fixes force you to stop and hunt around for what you need. Plus, if your craft room is on the smaller side, fitting everything into store-bought containers can feel like a puzzle that’s impossible to solve. A hanging storage rack can be a game-changer. It keeps your go-to supplies right at your fingertips and helps you stay in the zone without interruptions. Rather than spending all day hunting through store shelves or scrolling through Amazon, the DIY YouTube channel has a handy tutorial showing you how to make your own. And here’s the best part: it’s made mostly from affordable stuff you can grab at Dollar Tree. For this project, a broom handle works as the rod holding your storage baskets. To make that broom handle look nice, you’ll wrap it with some jute cord. Then grab four to five wire baskets in black or gold — enough to go along the whole handle — plus two glass cabinet knobs. You’ll also need cable ties, wall hooks (self-adhesive or screw-in work fine), scissors, and a hot glue gun. If you want to add a little extra flair, toss in some wide ribbons or fabric strips to weave through the baskets. Dmytro Zinkevych/Shutterstock
Grab a broom handle and some baskets to whip up your own storage rack
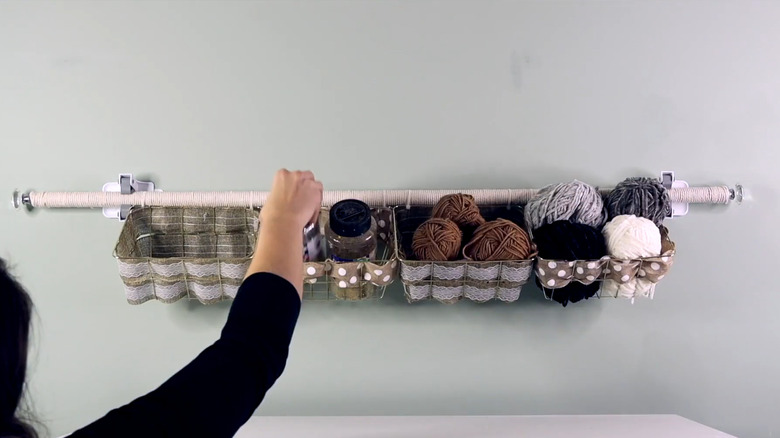
Building this rack takes a little elbow grease, but it’s worth it. Slap some hot glue on one end of the jute cord and stick it to one end of the broom handle. Let that dry, then wind the cord tightly all the way around the handle. When you get to the other end, glue that loose end down and trim off what’s extra. Cover up those glued spots by adding a bit of hot glue to the stems of your glass cabinet knobs and pushing them into each end of the broom handle. If you’re planning to thread fabric strips or ribbons through the baskets, do that now before you attach them to the handle. This step isn’t just pretty — it also keeps whatever you’ve got stashed inside from tumbling out.
Use cable ties to fasten each basket to the broom handle. Next, measure the handle and the height of your baskets and jot down those numbers. Use those measurements to mark where your wall hooks should go. If you’re storing heavier items, think about using more than two hooks for extra support. Once your hooks are on the wall, hang up your new rack and load those baskets with the supplies you grab the most — scissors, glue, pencils, yarn, sticker sheets, tape rolls, and whatever else you use constantly. Label each basket to keep things super organized. That way, you and anyone else in your craft room knows exactly where things belong. Storing ribbon in this organizer? Check out ways to turn it into a ribbon spool to maximize your storage space.