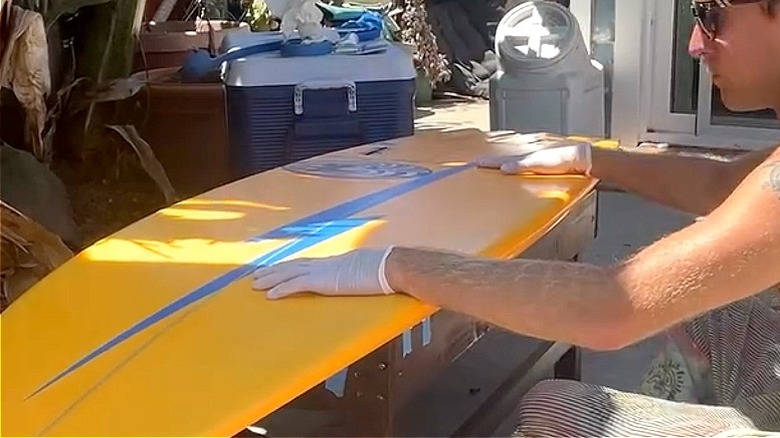
We may receive a commission on purchases made from links. Turns out you can turn just about anything into a creative living room table — old doors, vintage suitcases, wine crates, stacks of books, you name it. Even a surfboard! One surfer recently shared a pretty awesome DIY project on Instagram where he transformed one of his original custom surfboards into a sweet table topper. And honestly? It looks incredible. Ready to give this project a shot? You’ll just need some pre-cut lumber and a handful of other supplies, plus that old surfboard you’ve got lying around. It’s actually pretty straightforward! Keep your lumber budget in check by grabbing pine boards for your base. How many pieces you’ll need depends on your board’s size and what style you’re going for. The whole thing breaks down into three main parts: a top frame made with 1-by-4-inch wood, four table legs from 2-by-2-inch posts, and a lower support box built with 1-by-2-inch strips (these are just rough size suggestions). Olenick grabbed a 10-foot plank that measured 1 inch by 3 inches for his supplies. Of course, what works best really depends on your specific board and how you want the finished table to look. You’ll also grab some sandpaper, a saw, a box of 3-inch wood screws, a tube of clear silicone, epoxy adhesive, some wood stain, and an electric drill like the ones you can pick up on Amazon for around $22. Dudarev Mikhail/Shutterstock
Building your surfboard coffee table
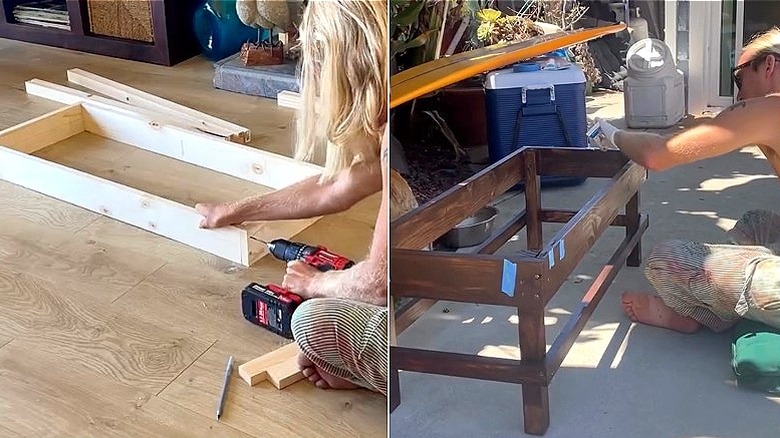
Start by building your table’s base top. Saw your wider wood pieces (think 1 inch by 4 inches) to create a rectangle shape. Stand these pieces up on their edges and screw them together at each corner to form a rectangular frame. This is where your surfboard will sit. After that’s done, cut your 2-by-2-inch wood posts down to your desired height, then attach the four legs to the inner corners of the base with screws.
Now it’s time for the box stretcher pieces. Cut them to the same size as your base, then screw them around the outside edge of the lower legs to lock everything together. Done! Your base is officially built. Next comes the fun part — staining it. A worn, weathered, or vintage stain could be perfect with your surfboard — or go big and choose a dark stain instead. Make sure your surfboard is squeaky clean, fin-free, and lightly sanded wherever it’ll touch the base.
Run a quick test fit to make sure everything lines up, then squeeze a line of adhesive along the top of the base. Flip your surfboard face-down onto the base, then weigh it down with something heavy like a full cooler or a stack of books while the adhesive dries. Finish things off by filling your surfboard’s fin boxes with sealant — that’ll keep dust and dirt from getting inside them.
Personalizing your surfboard coffee table
Before you sit back and admire your handiwork on this new surfboard coffee table, know that you’ve got tons of options to make it even more unique and functional. For instance, you could add a lower shelf if you want to boost its usefulness. You’d just need one extra piece of wood (a ½-inch thick board works great), and it won’t take much time — just double-check your measurements so it slides smoothly against the inner edges of the legs.
The shelf sits right where the box stretcher meets the table legs. Use it to lean into those beach vibes by loading it up with stuff like a rattan basket, some dried palm leaves, or maybe even glasses filled with sand. You could also jazz up your surfboard and other parts of the table with coastal-themed stickers for a fun, beachy feel.
Think tiki designs, sea turtles, and those retro sunset stickers that look like they belong on an actual surfboard at the beach. These little decorative touches are what’ll really make your coffee table the star of the show. (Here’s another DIY project idea too!)